How to Prepare a Video File Before Converting It to MP3
Why Your Source Video Is the #1 Factor in MP3 Quality
You spent twenty minutes hunting for the perfect MP3 bitrate. You read that 320 kbps is the gold standard, dialed every setting to the maximum, and hit start. The result still sounds like it was recorded underwater. Dialog vanishes under hiss. The high end feels smeared and plastic. Instead of fixing the problem, you doubled the file size. You blamed the converter. The real failure happened before you even opened the tool.
The audio trapped inside your video file is the only material you have to work with. No setting in the conversion window can invent detail that was never captured. This is the garbage-in, garbage-out principle, and it governs every conversion you will ever do. If the original recording was a 96 kbps mono track pulled from a compressed web stream, your output will be a 320 kbps mono track that takes up four times the space and sounds identical to the source—worse, actually, because every re-encode adds its own artifacts on top of the old ones.
The technical reason is that both AAC and MP3 use psychoacoustic models. These are algorithms that decide which frequencies you are least likely to notice, then discard them to save space. When you transcode from one compressed format to another—say, from the AAC track inside an MP4 to an MP3—the second model makes its own guesses about what to throw away, often deleting different material than the first model did. The losses stack. At best, transcoding preserves what is already there. At worst, it smears transients, dulls stereo separation, and blooms digital noise in the quiet sections. Preparation is not about enhancement. It is about damage control. It is about inspecting the raw material, cutting away what you do not need, isolating the correct track, and feeding the cleanest possible signal into the encoder so the loss stays minimal.
To see why, split the file in two. The .MP4 or .MKV sitting in your folder is a container—a box that holds separate streams. One stream is the picture, encoded with H.264 or H.265. The other is the sound, usually AAC, sometimes MP3, AC3, or raw LPCM. When you convert to MP3, you are discarding the video stream entirely and transcoding that audio stream into a new compressed format. The container does not matter to the final sound. What matters is the health of the audio stream trapped inside it.
That means one hard rule. If the source audio is clean, correctly balanced, and free of noise, do not process it before conversion. Every filter, every normalizer, and every re-encode adds a chance for error. Touch the file only when inspection proves the audio inside the container actually needs help.
Understanding the Anatomy of Your Video File's Audio
A video file is not a single solid object. Think of it as a shipping crate. Inside, the cargo is divided into separate pallets: one for video, one for audio, sometimes one for subtitles. The crate itself is the container format—MP4, MKV, MOV, or AVI. The pallet holding the sound is the audio stream, and it carries its own specifications that have nothing to do with the picture quality.
The first specification is the codec. This is the compression language used to store the sound. Most MP4 files you encounter hold AAC-LC, a format designed to squeeze solid quality into efficient file sizes. Older uploads sometimes contain MP3 audio directly. DVD and Blu-ray rips frequently carry AC3 at 384 or 448 kbps, or DTS at much higher bitrates, often wrapped inside an MKV. Professional camera files may use uncompressed LPCM, which is enormous but completely untouched by compression. Each codec leaves a different fingerprint. AAC tends to preserve stereo imaging well but can blur sharp transients at lower bitrates. AC3 sounds thicker but uses more space and was engineered for surround setups, not headphone stereo. Knowing the codec tells you what flaws to expect before you hear them.
Next is the bitrate, measured in kilobits per second. This is the amount of data allocated to the audio each second. A 64 kbps stream is a narrow pipe; it discards subtle harmonics, dulls high-frequency detail, and often collapses stereo separation into a joint stereo image to save space. A 128 kbps stream is the baseline for intelligible music. A 256 kbps stream keeps most of what casual listeners would notice. Bitrate is the strongest predictor of how much information survives, but it is not the only one.
Sample rate, measured in kilohertz, tells you how often the original analog wave was measured when it was digitized. CD audio uses 44.1 kHz. Nearly all video uses 48 kHz. The Nyquist theorem says a sample rate can only capture frequencies up to half its value, so 48 kHz captures content up to 24 kHz—well beyond what most adults hear, but the margin matters for filter slopes and phase accuracy. Anything higher, like 96 kHz, is rare outside professional production. The MP3 format itself is limited to 48 kHz, so high-sample-rate sources are downsampled during conversion.
Then there is bit depth, usually 16-bit or 24-bit. This determines the dynamic resolution—the fineness with which amplitude is measured. Sixteen-bit audio offers around 96 dB of dynamic range, which is enough for almost all consumer material. Twenty-four-bit gives more room for processing and quieter noise floors, but MP3 does not retain 24-bit resolution. It is worth knowing, however, because processing a 16-bit file aggressively in an editor can introduce rounding errors, while 24-bit tolerates more abuse.
Finally, channels describe how many separate audio signals are encoded. Mono is one channel. Stereo is two, left and right. A 5.1 surround track packs six discrete channels: front left, front right, center, low-frequency effects, rear left, and rear right. MP3 is almost always stereo, so feeding a surround track into a standard converter forces a process called downmixing, where channels are merged. Without proper downmixing, you can lose dialog or overload the stereo image.
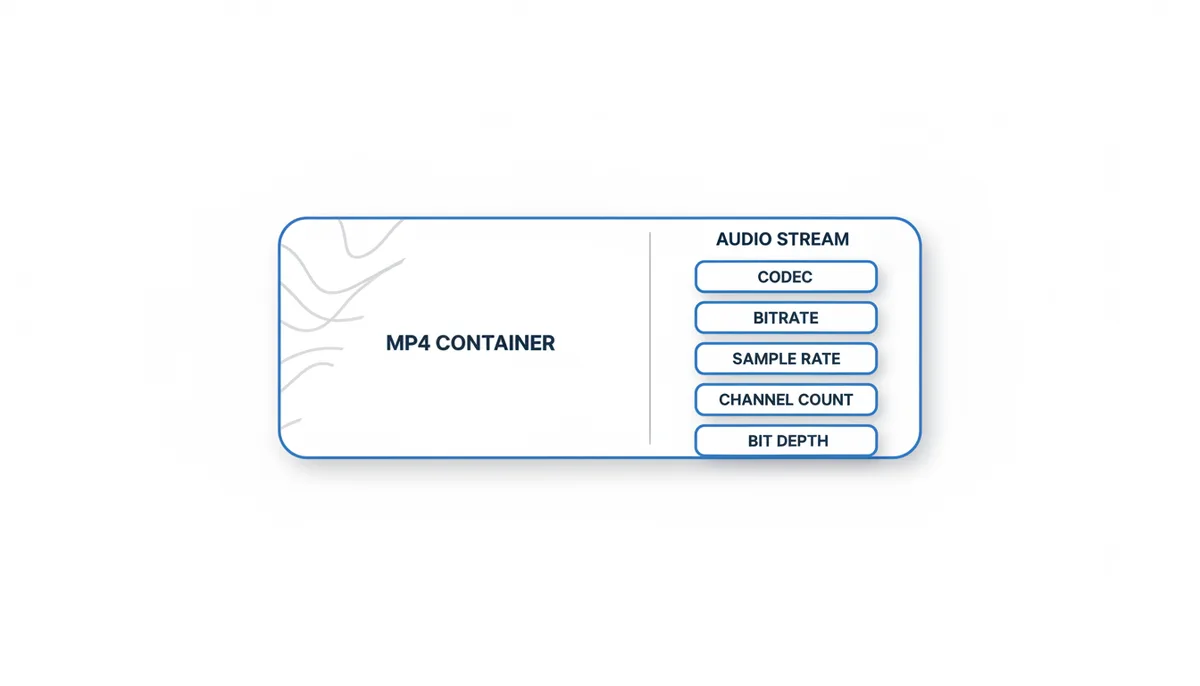
All five of these properties—codec, bitrate, sample rate, bit depth, and channels—are bundled into the audio stream inside the container. The video stream is just a neighbor. It does not help, hurt, or influence the audio stream in any way. A 4K HDR video can hold a 96 kbps mono AAC track, and a 480p file can contain a pristine 24-bit/48 kHz stereo WAV. Judge the sound on its own numbers.
How to Inspect Your Video's Audio Properties Before You Convert
You cannot prepare what you cannot see. Before you change anything, you need the numbers. The good news is that you do not need to spend money to get them.
VLC Media Player is free, runs on every major operating system, and exposes the raw data in seconds. Open your video file. On Windows or Linux, press Ctrl+J to open the Codec Information window. On macOS, go to the Tools menu, select Media Information, then click the Codec tab. You will see a list of streams, each with a type. Find the one labeled Type: Audio. VLC will show the codec—AAC, MP3, AC3, or something else—the sample rate in hertz, the bitrate in bits per second, and the number of channels. If the bitrate reads 192000, that is 192 kbps. Some files show the bitrate as variable or leave the field at zero. Variable bitrate means the quality shifts from moment to moment. That is not a flaw, but it means peak quality may be better than the average, and vice versa. Write down the codec, the bitrate mode, the sample rate, and the channel count. These four values are the blueprint for every decision you make next.
For a more comprehensive report, download MediaInfo from mediaarea.net. It is also free, and it reads the file like an engineer reads a schematic. Open the video, switch the view to Tree or Text, and scroll to the Audio section. MediaInfo will list the format profile, the bit depth, the channel layout—stereo, mono, or 5.1—and whether the stream uses constant or variable bitrate. It will also flag unusual codecs that might confuse a converter. If MediaInfo reports a DTS-HD Master Audio extension or an obscure PCM format, you know the file needs intermediate handling before a standard web conversion.
If you prefer the command line, FFprobe—installed alongside FFmpeg—gives you exact numbers in one shot. Run:
ffprobe -v error -select_streams a:0 -show_entries stream=codec_name,bit_rate,sample_rate,channels -of default=noprint_wrappers=1 input.mp4
That command isolates the first audio stream and prints the codec, bitrate, sample rate, and channel count. It is fast, scriptable, and immune to the interface variations of GUI tools.
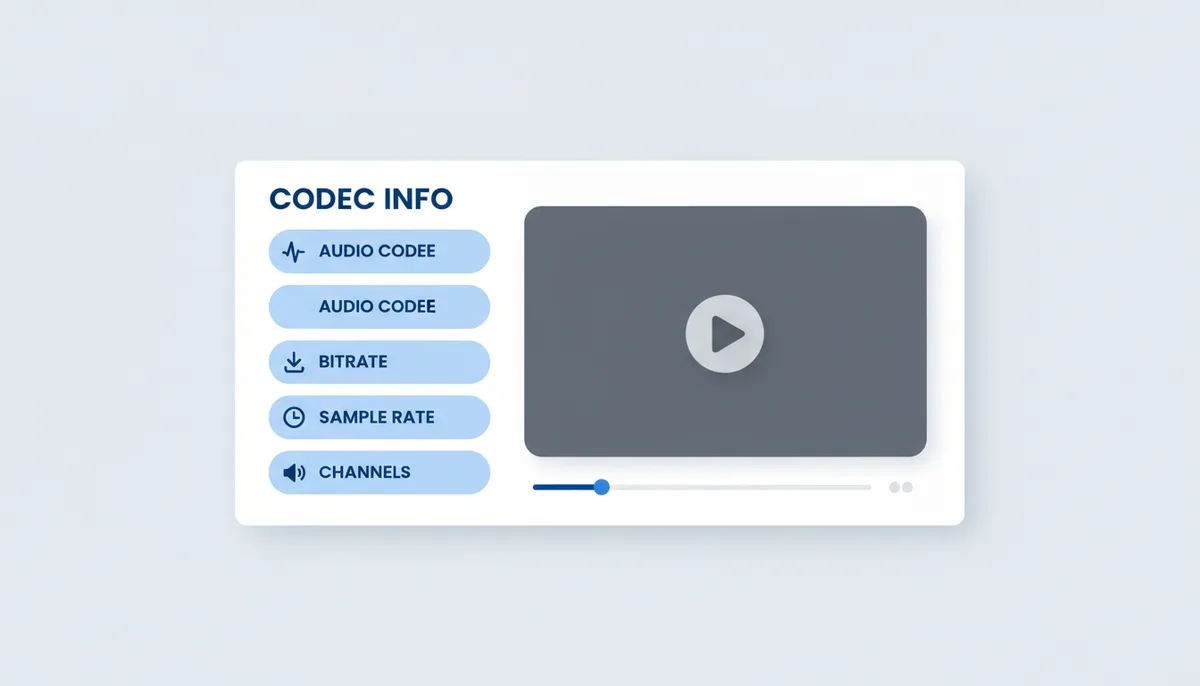
Do not skip this inspection. I have seen users waste hours tweaking MP3 settings to fix sync issues when the source video had a variable frame rate that VLC would have revealed immediately. Know your source before you touch a single slider.
Trimming the Fat: Why You Should Edit Video Length First
Converting an entire two-hour lecture when you only need the fifteen-minute Q&A is like transcribing a whole book to find one paragraph. It wastes time, inflates the chance of a browser or app crash, and produces a giant file you have to cut later anyway. Trimming first is faster, cleaner, and safer.
The distinction that matters is between lossless trimming and re-encoding. Lossless trimming cuts the container at the boundaries you choose and copies the existing audio and video streams into a new file without decompressing them. The audio quality remains bit-for-bit identical to the original. Tools like LosslessCut, Avidemux, or FFmpeg handle this perfectly. In LosslessCut, you drag the file in, scrub to your start and end points, and export. The operation takes seconds because the software is not rebuilding the audio; it is simply rewriting the container envelope around the segments you want.
Using FFmpeg, the same operation looks like this:
ffmpeg -ss 00:05:00 -to 00:20:00 -i input.mp4 -c copy -avoid_negative_ts make_zero output.mp4
The -ss and -to flags set your start and end times. The -c copy flag tells FFmpeg to copy both audio and video streams without re-encoding. The result is a smaller file with untouched audio quality.
Trimming inside a full video editor is a different story. DaVinci Resolve, Adobe Premiere Pro, and even free tools like Shotcut often force you to export, or render, the selection. That process decodes the audio stream and re-encodes it into a new stream, usually AAC. Even at high settings, this is another generation of loss. The audio gets compressed twice: once by the original source, and again by your editor, before it ever reaches the MP3 converter. If the original was already borderline—say, 128 kbps AAC—that second compression softens transients, collapses stereo width, and introduces pre-echo artifacts that no MP3 setting can remove.
Lossless cutters do have one limitation. They can only slice at keyframe boundaries without re-encoding the video. For audio extraction, this precision rarely matters. A half-second of extra lead-in or tail is irrelevant for an MP3. If you absolutely need frame-perfect cuts, re-encoding is unavoidable, but for audio extraction work, accept the rough cut. Preserve the quality.
Selecting the Right Audio Track (and Avoiding the Wrong One)
Multi-track video files are more common than most people realize. A DVD rip might contain a stereo mix and a 5.1 AC3 mix. A downloaded film might bundle the original language, a dubbed track, and a director's commentary. Screen recordings sometimes capture system audio on one track and microphone input on another. If you feed the whole file into a converter blindly, you may end up with a silent MP3, a commentary track you did not want, or a foreign-language dub.
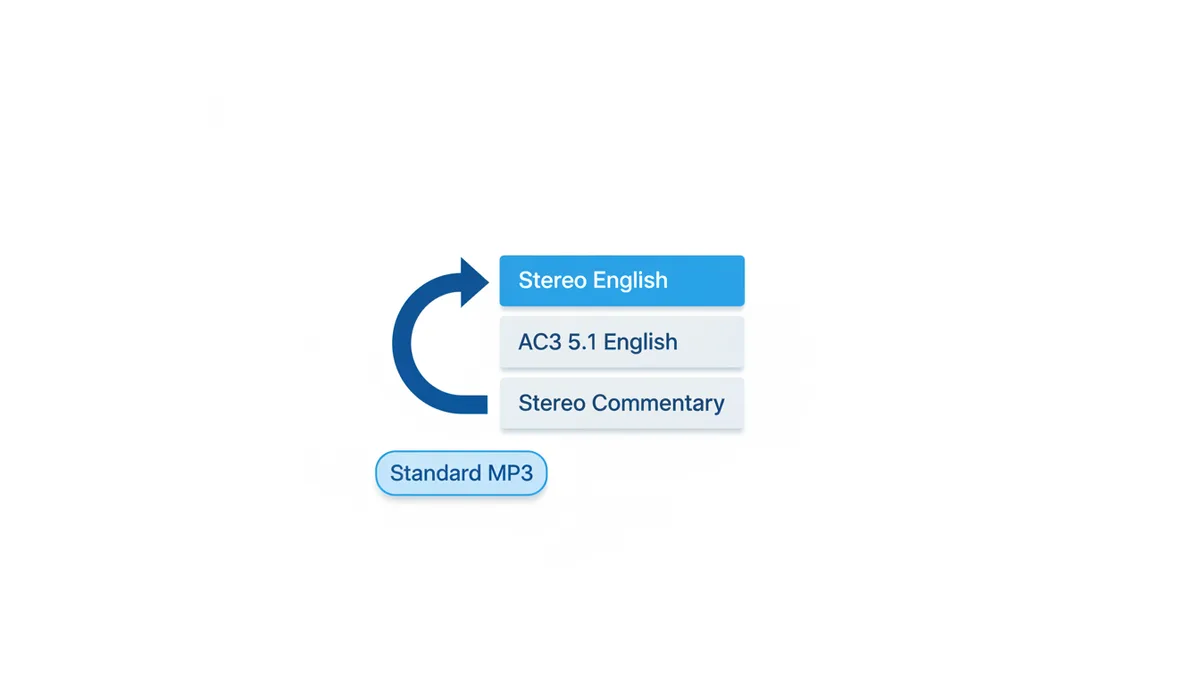
The fix is simple: listen before you convert. Open the file in VLC. Go to the Audio menu, then Audio Track. You will see a numbered list. Play each one for thirty seconds. Note the language, the content, and—if you can tell—the quality. You might see something like this:
Track 1: AAC, 128 kbps, Stereo (English)
Track 2: AC3, 640 kbps, 5.1 (English)
Track 3: AAC, 96 kbps, Stereo (Director's Commentary)
Many users instinctively gravitate toward Track 2 because the bitrate is higher. For MP3 stereo conversion, Track 1 is usually the safer choice. The AC3 track requires downmixing six channels into two, and not every converter handles channel balance correctly. You might lose the center channel—where most dialog lives—or overload the mix, causing distortion. Unless you specifically need the surround mix for a high-bitrate music extraction, I would pick the stereo track. It avoids the downmixing gamble entirely.
Some files contain audio description tracks for the visually impaired. These narrate the action between lines of dialog. Others contain isolated music and effects stems, meant for dubbing. If you convert these by accident, you get a voice describing facial expressions or an instrumental bed with no voices. Always verify. Thirty seconds of listening prevents an hour of regret.
Once you have identified the correct track, make sure your workflow targets it. Some tools default to Track 1 automatically. If your target track is buried deeper in the file, extract it first with FFmpeg by mapping the specific stream:
ffmpeg -i input.mkv -map 0:a:1 -c:a copy audio_only.ac3
That command pulls the second audio stream without touching the video. Feed the resulting file into your converter, and you know exactly what you are encoding.
Pre-Processing for Problem Audio: Normalization and Noise Reduction
Most of the time, you should convert the audio exactly as it is. If the recording plays back at a comfortable level and sounds clean, every filter you apply is an opportunity to make it worse, so leave it alone. But some recordings arrive broken. A lecture captured by a laptop microphone three feet from the speaker. An interview recorded in a room with an air conditioner that never shuts off. In these cases, the MP3 will be just as broken as the source unless you intervene. Intervention means two things: normalization and noise reduction, applied in a strict order and only when listening tells you they are needed.
The workflow starts with a lossless intermediate. Do not convert the video directly to MP3 and then try to fix it. MP3 compression throws away data permanently; editing a compressed file limits what you can recover and adds a second generation of artifacts on export. Instead, extract the audio to WAV first:
ffmpeg -i input.mp4 -vn -c:a pcm_s24le output.wav
That command drops the video and preserves the audio as 24-bit PCM, giving you headroom for processing. This intermediate step costs disk space, but it is the only way to fix audio without stacking compression on top of compression.
Step one inside the editor, if the recording needs it, is a high-pass filter. Persistent hum from air conditioning or electrical grounding often lives below 100 Hz, well under the useful range of the human voice. A steep high-pass filter at 80 Hz removes that rumble without touching speech. If the source is music with real bass content, lower the cutoff to 40 Hz or skip the filter entirely—an 80 Hz cut will thin out a bassline.
Step two is noise reduction, and it is where most people cause damage. Audacity handles this well, but the default settings are aggressive. Select a few seconds of pure background noise—no voices, no music—and let Audacity build a noise profile. Then apply reduction across the whole file. The trap is pushing the reduction above 12 dB or narrowing the frequency bands too aggressively. Do that, and the audio develops an underwater, metallic quality called artifacting. I would rather hear a faint hiss than lose the natural timbre of a speaking voice. Apply noise reduction once, gently, and stop.
Step three is normalization, which adjusts the overall volume to a standard level. Reach for it when the source plays noticeably quieter than everything else in your library, or when you are combining audio from several videos and the levels jump between files. Do not use simple peak normalization, which searches for the loudest spike and pulls everything up until that spike touches the ceiling. A single click or cough can trick peak normalization into leaving the rest of the audio too quiet. What you want is loudness normalization, measured in LUFS—Loudness Units Full Scale. LUFS judges loudness the way your ears do, averaging energy across the whole file rather than reacting to isolated spikes. For stereo content destined for headphones or streaming, -16 LUFS integrated is the widely used target; most podcast and music platforms land within a couple of units of it. For mono speech, -19 LUFS works well. A file normalized to these levels sounds balanced on phone speakers, car stereos, and earbuds without forcing the listener to crank the volume.
The order matters: normalize after noise reduction, not before. If you normalize first, the gain stage raises the noise floor along with the signal, and your noise profile no longer matches the audio. Cleaning first, then setting loudness, keeps the hiss down where the noise reduction left it.
After setting the loudness, check the true peak. True peak measures where the analog waveform will reconstruct after digital-to-analog conversion, and it can exceed 0 dBFS even when the digital samples do not. True peaks above -1 dBTP can clip during MP3 encoding, because the MP3 format reconstructs peaks differently than PCM. Aim for a true peak limit of -1.0 dBTP. That gives the encoder headroom and keeps the final MP3 clean.
With the WAV cleaned and leveled—high-pass if needed, gentle noise reduction, loudness normalized, peaks safe—export the final MP3 directly from Audacity, or feed the finished WAV into your converter. Whatever settings you choose next, you are now compressing the best version of the audio that exists.
Troubleshooting Common Pre-Conversion Problems
Even after inspection and trimming, some files arrive at the converter with hidden illnesses. Here are the symptoms, their root causes inside the source file, and the specific preparation step that cures them before you encode.
| Problem | Likely Cause & Pre-Conversion Fix |
|---|---|
| Final MP3 audio is out of sync | The source video uses a variable frame rate (VFR), common in phone recordings and screen captures. The audio clock drifts against the video clock during long clips. Fix by transcoding to a constant frame rate (CFR) with HandBrake or FFmpeg before extracting the audio. |
| MP3 is extremely quiet | The source audio was mastered at a low integrated loudness, often sitting well below modern listening targets. Normalize the audio track to -16 LUFS for stereo or -19 LUFS for mono before the final MP3 compression. |
| Music sounds hollow; dialog is missing entirely | The source was a 5.1 surround track and the converter dropped or mis-weighted the center channel during a bad downmix. Explicitly downmix to stereo with FFmpeg using -ac 2, or select the stereo track if the file contains one. |
| Audio has clicks, glitches, or periodic dropouts | The container index is corrupt or the audio stream has timestamp errors from a bad rip or interrupted download. Remux the file with FFmpeg using -c copy to rebuild the container without re-encoding the streams. |
| Persistent background hiss or electrical hum | Analog interference or a noisy recording environment, usually concentrated in low frequencies or a narrow band. Extract to WAV, apply a high-pass filter at 80 Hz, then run gentle noise reduction in an audio editor before the final conversion. |
| MP3 sounds muffled or "underwater" | The source was already low-bitrate, and heavy noise reduction or multiple re-encodings have stacked artifacts. Accept the source limit: undo any aggressive processing, and do not set the MP3 bitrate below 192 kbps for music. |
| Voices panned to one side or stereo image collapsed | The source was joint stereo at a low bitrate, or one channel was recorded much quieter than the other. Check the channel balance in a media player first. If your encoder offers the choice, use standard Stereo mode instead of Joint Stereo for the MP3. |
If you encounter one of these problems, resist the urge to tweak the MP3 bitrate or sample rate. The MP3 encoder is downstream. Fix the river at its source.
How to Choose MP3 Conversion Settings That Match Your Source
The most common mistake in conversion is optimism. Users see a 320 kbps option and assume it means "best." It does not. It means "largest." If the audio stream inside your video is a 128 kbps AAC track, converting it to 320 kbps MP3 is like photocopying a photocopy onto premium paper. The paper is nice. The image is still blurry. The extra bits do not restore discarded frequencies. They encode artifacts and quantization noise from the first compression, bloating the file without improving clarity.
The rule is straightforward: the output bitrate should match or modestly exceed the source bitrate, but it should never jump tiers. Transcoding adds its own small losses, so a slight buffer is sensible. If the source is 128 kbps, aim for 192 kbps MP3. That fifty-percent headroom absorbs the generational hit. Going to 320 simply swells the file. For perspective, a five-minute stereo track at 128 kbps is roughly 5 MB. At 320 kbps, it is 12 MB. That 7 MB buys you nothing if the source was only 128.
Content type matters as much as bitrate. Speech is forgiving. A 96 kbps source containing a podcast or lecture converts cleanly to 128 kbps MP3, mono or joint stereo, and remains perfectly intelligible. Music is brutal. Cymbals, reverb tails, and dense synthesizer layers expose every missing bit. For music, start at 192 kbps and only go higher if the source bitrate and fidelity justify it.
Variable bitrate modes often outperform constant bitrate for the same file size. V0, the highest-quality VBR preset in the LAME encoder, averages around 245 kbps but allocates more data to complex passages and less to silence. For lossless sources, V0 is frequently preferable to fixed 320 CBR because it respects the material's dynamics and often yields a smaller file. For speech, V5 or V6 saves significant space without audible penalty. If your converter offers VBR presets, use them for music. Use CBR only when the destination device is ancient and known to struggle with VBR headers.
| Source Audio Bitrate | Content Type | Recommended MP3 Bitrate | Rationale |
|---|---|---|---|
| Under 96 kbps | Speech / Podcast | 128 kbps Mono | The source is already heavily compromised. Higher bitrates preserve artifacts, not detail, and waste space. |
| 96–128 kbps | General / Mixed Music | 192 kbps | Standard web video AAC. 192 absorbs transcode losses without the bloat of 320. |
| 160–256 kbps | High-Fidelity Music | 256 kbps | A high-quality source deserves a high-quality output. Minimizes generational loss for critical listening. |
| Lossless (FLAC / WAV / LPCM) | Archival / Master Recording | 320 kbps or V0 | Only when file size truly does not matter. You are archiving the best possible compressed version of a pristine source. |
| 5.1 / 7.1 Surround (AC3 / DTS) | Film / Concert Mix | 192–256 kbps Stereo | Downmixing folds multiple channels into two. 192 is sufficient for stereo MP3; 256 for dense, dynamic mixes. |
Once your settings match the source, the tool matters less than the preparation. A well-prepared file sent through a basic browser converter will outperform a raw file pushed through a boutique encoder. If you use an online tool like ExtractSound, the inspection, trimming, and cleaning you did beforehand is what determines whether the MP3 sounds professional or patched-together.
Handling Advanced Cases: Surround Sound and High-Resolution Audio
Stereo MP3 is the destination for almost every user, but some source files are not stereo. They are 5.1, 7.1, or even object-based mixes. Converting these requires downmixing: the mathematical blending of multiple channels into two. There is no single recipe for this. The level at which the center channel—which carries most film dialog—is folded into the left and right channels, how far the rear channels are mixed in, and whether the low-frequency effects channel is blended at a steep attenuation or dropped altogether all vary by tool, channel layout, and the downmix standard being followed. The result can also clip if the algorithm does not compensate for the stacked levels. When dialog balance matters, do not leave this to chance: force the stereo downmix yourself and listen to a dialog-heavy passage before you commit to the final encode.
If your converter handles downmixing automatically, all of this is invisible—until it goes wrong. Then you may get only the left and right front channels, losing dialog entirely, or a mangled fold that distorts when the center channel piles on top. You can force a clean downmix with FFmpeg before conversion:
ffmpeg -i input.mkv -ac 2 -c:a pcm_s16le output.wav
The -ac 2 flag sets two audio channels. This produces a standard stereo WAV you can convert to MP3 without gambling on how the online tool handles channel mapping. Play thirty seconds of the WAV first. If the dialog sits clearly above the music and effects, the downmix worked.
Now, a hard truth about video specs that do not matter. Resolution—1080p, 4K, 8K—has zero impact on the audio stream. HDR, 10-bit color depth, frame rate, H.264 versus H.265 efficiency: these are all properties of the video stream. A 480p file can contain a pristine 256 kbps stereo track. A 4K blockbuster might ship with a 96 kbps commentary track as the default audio. Do not let the sharpness of the picture seduce you into thinking the sound matches it.
High-resolution audio is the final edge case. Some production files contain 24-bit depth at 96 kHz or even 192 kHz, stored as FLAC or raw PCM inside an MKV. MP3 supports only a fixed set of sample rates—48, 44.1, and 32 kHz in its most common form, plus lower rates in later variants of the standard—so a 96 kHz source must be resampled to a supported rate during encoding. Whether the encoder lands on 48 or 44.1 kHz depends on the tool and its settings; for video-sourced material, 48 kHz is the natural target because the audio almost always runs at 48 kHz inside the file already. Bit depth works differently too. MP3 does not store fixed-bit PCM samples the way a WAV does—it encodes frequency information per frame—so the source's 24-bit depth is not carried into the MP3 in any literal sense, and no dithering decision is yours to make at that stage. What a high-resolution source still buys you is cleaner input for the resampler: more information going in means fewer rounding errors on the way to the final rate. The practical difference is subtle. For most purposes, a well-encoded 192 kbps MP3 from a clean 16-bit/48 kHz source is indistinguishable from one encoded from 24-bit/96 kHz material. Prepare the file correctly, and do not chase specifications your ears cannot verify.
Frequently Asked Questions
Does the video resolution affect the MP3 audio quality?
No. Resolution, frame rate, bit depth, and video codec are stored in a completely separate stream from the audio. A low-resolution clip can contain excellent audio, and a 4K file can contain a tiny, compressed mono track. Inspect the audio properties, not the pixel count.
Can I make my audio sound better than the original video?
No. You cannot create detail that was never recorded. Normalization and noise reduction can balance volume and clean up background hiss, but they cannot restore clarity to a muffled microphone, add missing frequencies to a low-bitrate stream, or recover dynamic range that was crushed during the original recording. Preparation is repair, not resurrection.
Should I convert the video to WAV first, and then to MP3?
Generally, no. A direct conversion from the video's audio track to MP3 is faster and avoids an intermediate generation of files. Only extract to WAV first if you need to edit the audio—trimming with sample precision, normalizing loudness, or applying noise reduction—in a dedicated editor like Audacity. Once the editing is done, convert the finished WAV to MP3.
What's the difference between the audio in an MP4 and an MP3?
The audio inside an MP4 file is usually AAC, a compressed format similar to MP3 but slightly more efficient at equivalent bitrates. Converting from MP4 to MP3 is transcoding: translating one compressed format into another. Both are lossy, which is why minimizing how many times the audio is compressed is the entire point of preparation.
My video is an MKV file, not MP4. Does this guide still apply?
Yes. MKV and MP4 are both container formats. They wrap the same kinds of audio streams—AAC, AC3, FLAC, MP3, and others. Every principle in this guide applies identically. Inspect the stream, select the right track, trim losslessly if needed, and convert.
Will trimming the video reduce the audio quality?
Not if you use a lossless trimmer. Tools like LosslessCut or FFmpeg with the -c copy flag slice the file without re-encoding the audio. The quality stays bit-for-bit identical. If you trim in a standard editor that forces an export or render, the audio is re-compressed, and quality drops. Always choose lossless trimming when your goal is audio extraction.