How to Convert AVI or MOV to MP3 Without Making an MP4 First
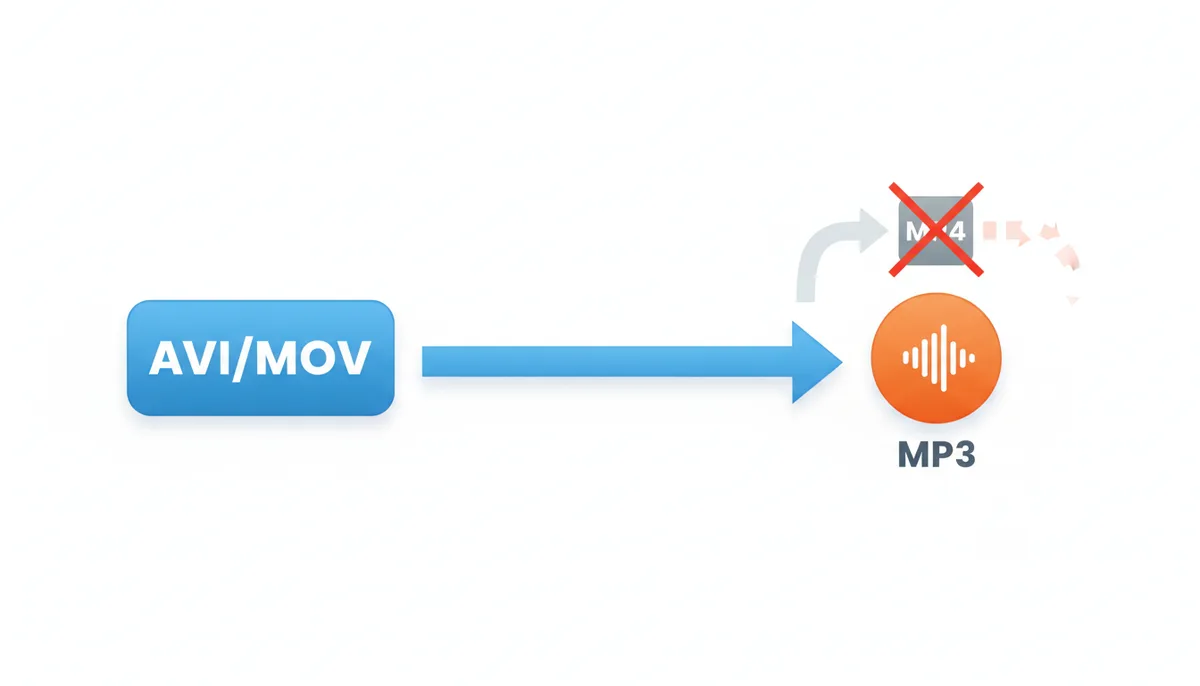
You’ve got an AVI file from an old camcorder or a MOV from a phone, and you just want the audio as an MP3. You search for a solution, and half the tutorials tell you to convert the video to MP4 first, then extract the audio. That’s like driving to the grocery store by first going to the airport. It adds time, can degrade quality, and is completely unnecessary.
The truth is, you can go directly from AVI or MOV to MP3 in one step. Here’s how, and why you should never make an MP4 first.
Why Do People Think You Must Convert to MP4 First?
The advice is everywhere, especially in older forum posts and YouTube tutorials from a decade ago. It stems from two things: convenience for the tool, not for you, and a misunderstanding of how video files work.
Early online converters and basic software were often built to handle a single, “universal” format like MP4. Their workflow was rigid: accept input, convert everything to our internal MP4 standard, then extract the audio. For them, it was easier to code. For you, it meant an extra, silent encoding cycle for the video stream—a process that consumes processing power and time, even if you’re throwing the video data away immediately.
The other reason is the myth of compatibility. MP4 is a more modern, widely supported container than AVI. Someone, somewhere, decided that converting to MP4 was a “safe” step to ensure the file could be read. But if your goal is audio, the container’s video compatibility is irrelevant. The audio stream inside an AVI or MOV is almost always in a format any decent audio converter can read directly. Adding an MP4 step doesn’t make it more compatible; it just adds a pointless transcode.
Direct conversion is faster, simpler, and avoids a generation loss. You’re not re-encoding something you plan to discard. You’re taking the shortest path from point A to point B.
What's Actually Inside an AVI or MOV File?
To understand why the direct route works, you need to know what you’re working with. An AVI or MOV file is not a monolithic block of “video.” It’s a container format—think of it as a digital lunchbox.
Inside this lunchbox are separate, self-contained items: a video stream (made with a codec like H.264, DivX, or ProRes) and an audio stream (made with a codec like PCM, AAC, or MP3). They are packed together for synchronized playback, but they are independent data tracks.
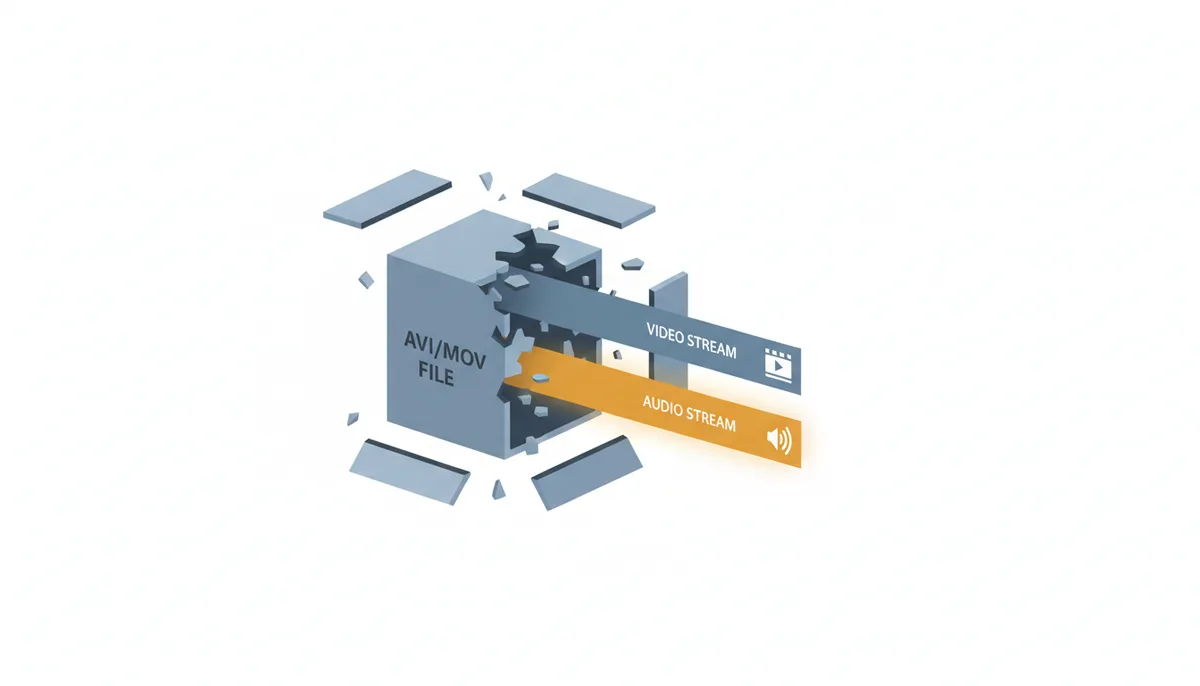
Converting to MP3 involves two potential operations:
- Demuxing: This is short for “demultiplexing.” It’s the process of opening the lunchbox and taking out just the audio stream packet. If your source audio is already in MP3 format, you could theoretically just demux it and be done, though this is rare.
- Transcoding: This is the re-encoding part. If the audio stream is in PCM (uncompressed CD quality) or AAC, you need to convert it into the MP3 format. This is where you choose your bitrate and quality settings.
The key is that neither of these steps requires you to touch the video stream. You don’t need to convert it to MP4, to H.264, or to anything else. You can ignore it completely. The software that tells you to make an MP4 first is essentially forcing you to repack the entire lunchbox into a different box before letting you take out the apple.
How Do You Convert AVI or MOV to MP3 Directly Online?
For a one-off file where you value speed and simplicity over fine-grained control, an online converter is the right choice. The trick is finding one that processes files directly in your browser, without uploading them to a server. This is crucial for privacy and speed with larger files.
Here’s how to do it with a tool like ExtractSound, which works on this client-side principle:
- Go to the converter page. You’ll typically see a large “Upload” or “Drop File Here” area.
- Select your AVI or MOV file. Drag and drop it into the browser window. Because the processing happens locally, this step is instant—the file isn’t traveling to a server.
- Choose MP3 as your output format. The interface should present a dropdown or list of audio formats. Select “MP3.”
- Select your quality settings. You’ll often get a choice of bitrate (e.g., 128 kbps, 192 kbps, 320 kbps). For most purposes, 192 kbps is a sweet spot between quality and file size. We’ll dive deeper into settings later.
- Start the conversion. Click the “Convert” button. The tool will demux and transcode the audio stream in your browser. A progress bar will show you how it’s going.
- Download your MP3. Once complete, a download link will appear. Click it, and your file is saved directly to your computer. Since the file never left your machine, you can be confident it’s been deleted from the web service’s temporary memory.
Use this method when you have a file under, say, 2GB, you need it done now, and you don’t want to install software. It’s perfect for pulling audio from a single lecture recording or a home video.
Which Desktop Software Can Convert AVI/MOV to MP3?
When an online tool isn’t enough—maybe your file is huge, you have a batch of files, or you need precise control—desktop software is the answer. You have three primary tiers to choose from.
- VLC Media Player: It’s the Swiss Army knife. You probably have it installed already. It’s perfect for direct, GUI-driven conversions where you want more control than an online tool but don’t want to touch a command line. I use it for quick conversions where I need to verify the audio track first.
- FFmpeg: This is the engine that powers most other converters. It’s a command-line tool, which means no graphical interface, just text commands. It’s intimidating at first but unbeatable for automation, batch processing, and getting the exact result you want. If you need to convert 100 files, you write one command.
- Audacity: This is an audio editor first. Use it when you need to extract the audio and then edit it—trim silence, normalize volume, apply filters. It’s a two-step process (import the video file to extract the audio to its timeline, then export as MP3), but it’s the right tool if editing is your goal.
Professional editors like Adobe Premiere Pro or DaVinci Resolve can also export MP3 directly from a timeline, but they’re overkill for simple extraction. Use them only if the file is already in an editing project.
How Do I Use VLC as a Direct AVI/MOV to MP3 Converter?
VLC’s conversion feature is hidden behind its playback menu. Here’s the exact walkthrough.
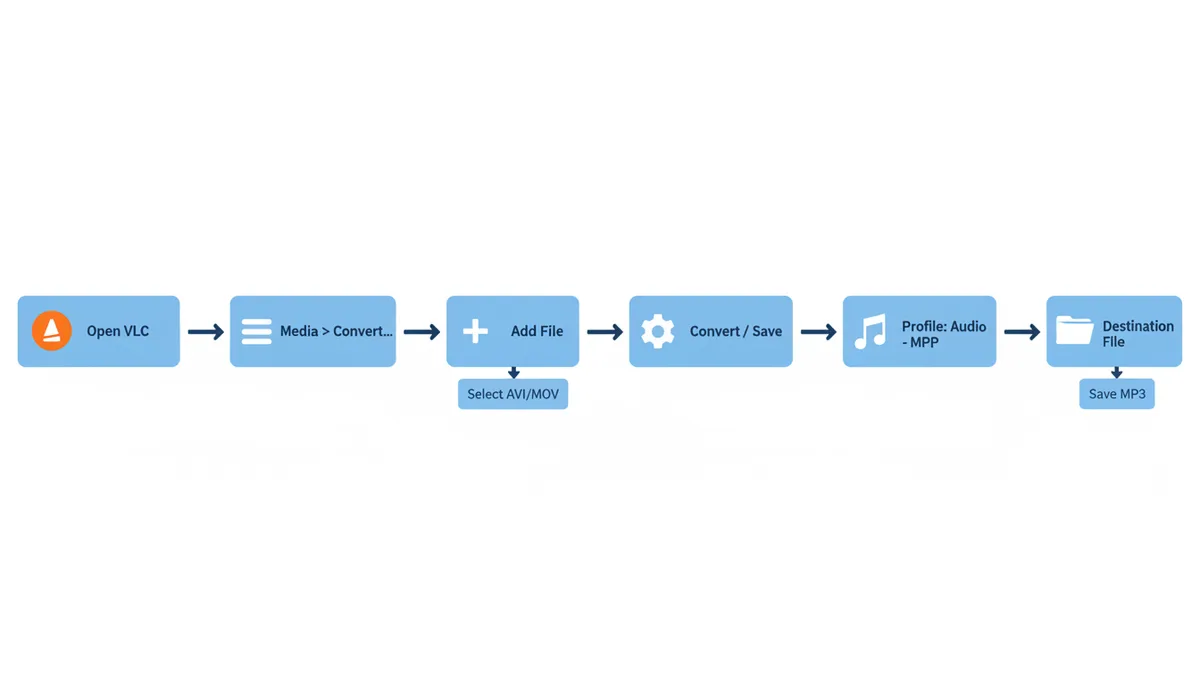
- Open VLC. Do not open your video file directly. Start from the main window.
- Click Media in the top menu, then select Convert / Save… (or press Ctrl+R).
- In the new window, click the Add… button to select your AVI or MOV file. Then click the Convert / Save button at the bottom.
- Now you’re in the key dialog. Under “Settings,” next to Profile, click the dropdown and select Audio – MP3. This is the built-in profile for this exact task.
- Next to “Destination File,” click Browse… and choose where to save your new MP3. Give it a clear name.
- Click Start. VLC will now show playback controls, but it’s not playing the video—it’s converting. Wait for the progress bar to fill completely.
Customizing the MP3 quality in VLC: The default “Audio – MP3” profile uses a 128 kbps bitrate, which is a bit low for music. Before hitting Start, click the spanner/wrench icon next to the Profile dropdown. In the “Audio codec” tab, you’ll see the “Bitrate” setting. Change it to 192 or 320 (kbps). Click “Save.” Now your custom profile will be used.
How Do I Use FFmpeg for the Cleanest Conversion?
FFmpeg is the professional’s choice. You need to install it first and then use a terminal (Command Prompt on Windows, Terminal on Mac/Linux). The power is in the precision.
The most basic command to extract audio and encode to MP3 is:
ffmpeg -i input.mov -vn -acodec libmp3lame output.mp3
-i input.mov: Specifies the input file. Use your file’s name.-vn: This means “no video.” It tells FFmpeg to ignore the video stream entirely. This is the command that makes the MP4 step obsolete.-acodec libmp3lame: Sets the audio codec to the LAME MP3 encoder, the best one available.output.mp3: The name of your new file.
That command uses default settings. To control quality, you specify the bitrate. This command creates a high-quality 320 kbps MP3:
ffmpeg -i input.avi -vn -ab 320k -ac 2 -ar 44100 output.mp3
-ab 320k: Audio bitrate at 320 kilobits per second.-ac 2: Forces stereo (2 channel) output.-ar 44100: Sets the sample rate to 44.1 kHz, the standard for CDs.
To convert every MOV file in a folder to MP3, you can use a batch command. On Windows in Command Prompt, navigate to the folder and use:
for %i in (*.mov) do ffmpeg -i "%i" -vn -ab 192k "%~ni.mp3"
This one line will create a 192 kbps MP3 for each MOV file, saving you hours of manual work. For full command-line syntax and advanced options, see the official FFmpeg documentation at FFmpeg documentation.
What Audio Settings Should I Choose for My MP3?
Choosing settings is about balancing quality against file size. The primary lever is bitrate—the amount of data used per second of audio. Higher bitrate = better quality = larger file.
| Bitrate | Quality | Typical Use Case |
|---|---|---|
| 128 kbps | Good | Speech (podcasts, lectures), small file size priority. |
| 192 kbps | Very Good | General music and voice where a good balance between quality and file size matters. |
| 256 kbps | Excellent | High-quality music or important recordings where you want extra fidelity without huge files. |
| 320 kbps | Maximum | Maximum MP3 quality; choose when file size is not a concern and you want the best lossy result. |
You’ll also choose between Constant Bitrate (CBR) and Variable Bitrate (VBR). CBR uses the same bitrate throughout, which is simple and compatible. VBR varies the bitrate based on the complexity of the audio (using more for a loud chorus, less for quiet passages), giving you better quality for the same average file size. For music, VBR is usually better. Most tools default to CBR for wider compatibility, but in software like FFmpeg or advanced converters, you can choose VBR.
Sample rate (like 44.1 kHz) and channels (Stereo) are usually best left at their standard settings unless you have a specific reason to change them. Matching the source file’s sample rate is a safe bet.
How Do I Choose Between Online and Desktop Converters?
Your choice isn’t about which tool is “better,” but which is better for your situation right now. Here’s the breakdown.
| Tool Type | Ease of Use | Privacy | Max File Size | Batch Processing | Quality Control | Cost |
|---|---|---|---|---|---|---|
| Online (e.g., ExtractSound) | Easiest: drag, drop, click. | High (if client-side); files never leave your computer. | Limited by browser memory, usually 2-4GB. | No. One file at a time. | Basic (preset bitrates). | Free. |
| Desktop GUI (e.g., VLC) | Medium: menu navigation required. | Perfect. Everything stays on your PC. | Limited only by your hard drive space. | No (without workarounds). | Medium (can customize bitrate). | Free. |
| Desktop CLI (e.g., FFmpeg) | Hardest: requires command line knowledge. | Perfect. | Unlimited. | Yes. Its core strength. | Maximum (full parameter control). | Free. |
My rule of thumb: Use an online client-side converter for one-off files under a few gigabytes when you’re in a hurry. Use VLC when you need a bit more control or have a very large single file. Use FFmpeg when you have more than two files to convert, or when you need to script the process for repeatable results.
What Do I Do If the Audio Quality is Bad or Missing?
Sometimes, things go wrong. Here are the common failures and how to fix them.
Problem: “My MP3 has no sound!”
This almost always means the converter selected the wrong audio stream. Many video files can contain multiple audio tracks—like a director’s commentary or different languages. Your converter might have grabbed an empty track. In VLC, before converting, open the file normally, go to Audio > Audio Track and see how many are listed. In FFmpeg, use ffmpeg -i input.mov to list all streams. You’ll see something like Stream #0:1(eng): Audio. To select a specific stream (e.g., stream #1), add -map 0:1 to your FFmpeg command before the output file name.
Problem: “The sound is tinny, muffled, or full of artifacts.”
You used too low a bitrate. Re-convert the original source file using a higher bitrate—192 kbps or above. Don’t convert the bad MP3 again; that will compound the quality loss. Always go back to the original AVI or MOV.
Problem: “My converter won’t read the file at all.”
You might be dealing with a very old or obscure codec. First, identify what’s inside. Use a free tool like MediaInfo to open the file. It will tell you the exact audio codec. If it’s something truly rare, try using VLC or FFmpeg, as they support the widest range of codecs. As a last resort, you can use a video editor like DaVinci Resolve (free) to import the file and then export an MP3, as these editors often have robust codec libraries.
What's the Real Difference Between "Convert" and "Extract" in Practice?
You'll see both terms used, often interchangeably, but they describe different technical operations with real consequences for your output file. Understanding this distinction is the key to knowing what you're actually getting.
Extraction (Demuxing) is a copy-paste operation. The software opens the container, finds the audio stream, and copies its data byte-for-byte into a new file, often just changing the file extension. If your MOV file has an AAC audio track at 256 kbps, extracting it gives you an exact copy of that AAC data in an M4A file. No quality is lost because nothing is re-encoded. The catch? The file isn't an MP3. It's still an AAC file. Many devices play AAC, but if you specifically need the MP3 format, extraction alone won't get you there.
Conversion (Transcoding) is a re-encoding operation. The software decodes the original audio data (e.g., AAC, PCM) back to an uncompressed state and then encodes it into the MP3 format using the MP3 codec (like LAME). This is where you choose your bitrate. This process is lossy—it permanently discards audio information to achieve compression. Every time you transcode a lossy format to another lossy format, you lose more data. It's like making a photocopy of a photocopy; the quality degrades.
So, when you use a tool to go from MOV to MP3, you are both extracting and converting. The tool first demuxes the audio stream from the video, then transcodes that stream to MP3.
The Practical Test: Let's say you have a MOV file with a PCM (uncompressed) audio track. You use two methods:
- In FFmpeg, you run:
ffmpeg -i input.mov -vn -acodec copy output.m4a. The-acodec copyflag means "copy the stream without re-encoding." This is pure extraction. The process takes seconds, and the output is a large, perfect-quality file. - Then you run:
ffmpeg -i input.mov -vn -ab 192k output.mp3. This transcodes. It takes longer, and the output is a smaller MP3 with lossy compression.
The trade-off is speed/quality vs. compatibility/size. If you need perfect archival of the audio, extract to a lossless format like WAV (from PCM) or M4A (from AAC). If you need a widely compatible, smaller file for a playlist or podcast, transcode to MP3 at a high bitrate. The mistake is needlessly transcoding something that was already in a perfectly good compressed format.
The Hidden Cost: How Your Source File's Audio Codec Dictates Everything
Not all AVI and MOV files are created equal. The "audio codec" inside the container is the single biggest factor determining your output quality, processing speed, and even whether a tool can read the file at all. This is the detail most guides gloss over.
Here are the common codecs you'll find and what they mean for your MP3 conversion:
- PCM (Pulse-Code Modulation) / LPCM: This is uncompressed, raw audio data—the same format used on audio CDs. It's the highest quality you'll find in consumer files, common in MOVs from screen recordings or older AVIs. File sizes are huge (about 10 MB per minute for stereo). Converting PCM to MP3 gives the encoder the cleanest, most detailed source to work from. You can choose a lower MP3 bitrate (like 192k) and still get excellent results because you're starting from a pristine source.
- AAC (Advanced Audio Coding): The standard for MP4s, MOVs, and iTunes. It's a lossy format like MP3, but more efficient. A 128 kbps AAC sounds about as good as a 160 kbps MP3. If your source is AAC, converting it to MP3 means you're transcoding from one lossy format to another. To avoid noticeable generational loss, your output MP3 bitrate should be higher than the source AAC bitrate. If you don't know the source bitrate, default to 256 kbps or higher for the MP3.
- MP3: Yes, sometimes the audio track inside an AVI is already an MP3 stream. In this case, a true "extraction" (demuxing) is possible. Using
ffmpeg -i input.avi -vn -acodec copy output.mp3would give you that original MP3 stream instantly, with zero quality loss. Re-encoding it would be a pointless mistake. - AC3 (Dolby Digital): Common in DVD rips and some camcorder AVIs. It's a multi-channel format (5.1 surround). Converting this to stereo MP3 requires a "downmix." If not done correctly, you'll get very quiet or messed-up audio. Tools like FFmpeg handle this automatically with the
-ac 2flag, but it's a point where things can go wrong.
How to Find Out: Use the free tool MediaInfo (or ffmpeg -i yourfile.mov). Look for the "Audio" section. It will tell you the "Codec" (e.g., AAC LC) and the "Bit rate" (e.g., 317 kb/s). This intel tells you what you're working with. A PCM source lets you be flexible with MP3 settings. A low-bitrate AAC source (96 kbps) means you can't create a high-quality MP3 from it, no matter what bitrate you choose—the detail is already gone.
When "Direct Conversion" Fails: Handling Problem Files and Edge Cases
Sometimes, you follow the steps and the result is silence, garbled noise, or an error. It's not you; it's the file. Here’s a diagnostic checklist for when the standard process breaks down.
1. Multiple Audio Tracks: The file has a commentary track, a foreign language dub, or an empty "descriptive audio" track. Your converter grabbed track 2 (silence) instead of track 1 (the main audio). Fix: In VLC, before converting, play the file and use the Audio > Audio Track menu to cycle through. Note which one works. In FFmpeg, after ffmpeg -i input.mov, you'll see listed streams: Stream #0:1(eng) and Stream #0:2(fre). To convert only the English track (stream 0:1), use: ffmpeg -i input.mov -map 0:1 -vn -ab 192k output.mp3.
2. Corrupted or Incomplete Container: This happens with files from old hard drives or interrupted downloads. The video might play but the converter chokes. Fix: Try using VLC or FFmpeg with error-correction flags. For FFmpeg: ffmpeg -err_detect ignore_err -i corrupted.avi -vn output.mp3. This tells it to skip over bad bits and salvage what it can. The audio might have jumps or skips, but it’s better than nothing.
3. Unsupported or Obsolete Codec: An AVI from a 1998 digital camera might use an old audio codec like "Voxware MetaVoice." Modern tools don't include it. Fix: First, identify it with MediaInfo. Search for the codec name plus "codec pack." Installing the combined "K-Lite Codec Pack Basic" can add system-level support, allowing VLC or FFmpeg to then read it. As a last resort, play the file in a media player that can handle it (like an old version of Windows Media Player with the correct codec) and use a system audio recorder (like Audacity set to record "Windows WASAPI" or "loopback") to record the audio as it plays. It's a hack, but it works.
4. Variable Frame Rate (VFR) Audio: Rare, but some screen recordings have audio streams with irregular timing. This can cause the audio to slowly drift out of sync during conversion. Fix: FFmpeg can fix this on the fly. Use: ffmpeg -i input.mov -vn -af aresample=async=1 -ab 192k output.mp3. The aresample=async=1 filter resynchronizes the audio stream.
5. Very High-Volume or Clipping Sources: A concert recording might already be digitally distorted (clipped). Simply converting it to MP3 will preserve the distortion. Fix: This is where a tool like Audacity is necessary. Import the audio, apply the "Limiter" or "Clip Fix" effect to reduce peaks, then export to MP3. This is post-processing, not a conversion flaw, but it's the only way to salvage the file.
The rule is: when a standard conversion fails, don't just try another converter. Diagnose the source file first. The problem is almost always in the original data, not the tool.
Frequently Asked Questions
Is it legal to convert a video from YouTube to MP3?
It is generally against YouTube's Terms of Service to download or make copies of content without permission. Converting copyrighted material you don't own is a violation of copyright law in most countries. This applies regardless of the tool or method you use.
Does converting AVI/MOV to MP3 reduce the audio quality?
Yes, almost always. MP3 is a 'lossy' format, meaning it discards some audio data to reduce file size. The goal is to use a high enough bitrate (like 192 kbps or higher) so that the quality loss is not perceptible to the human ear. Converting from one lossy format (like a low-bitrate AAC in a MOV) to MP3 will cause further degradation.
What's the difference between extracting and converting?
Extracting (or demuxing) means taking the original audio stream out of the video container and saving it unchanged—for example, pulling an AAC track from a MOV and saving it as a .m4a file. Converting (or transcoding) means re-encoding that audio stream into a new format, like MP3, which changes the data. The process from AVI/MOV to MP3 usually involves both: extracting the raw audio data, then converting it.
Can I convert the MP3 back to an AVI or MOV file?
No. An MP3 file contains only audio data. The video information was permanently separated and discarded during the initial conversion. You could combine the MP3 with new video footage, but you cannot recreate the original video from the MP3 alone.
Why is my converted MP3 file so large?
You likely used a very high bitrate (like 320 kbps) or the source audio is very long (e.g., a 2-hour lecture). A two-hour audio file at 320 kbps will be about 280 MB. You can re-convert the original with a lower bitrate (e.g., 128 kbps) to get a significantly smaller file, at the cost of some audio fidelity.
Which is better, AVI or MOV?
Neither is inherently 'better' for audio extraction; they are both container formats. MOV is Apple's standard and is often used in professional video editing environments. AVI is an older Microsoft standard that is less efficient but widely supported. When your goal is to get an MP3 out of them, the container is just the wrapper—what matters is the audio codec inside, and both can contain high-quality audio.
Sources
- FFmpeg — Command-line syntax and capabilities for audio extraction and transcoding from video files.
- VideoLAN (VLC) — Features and procedures for using the 'Convert / Save' function within the VLC Media Player.
- Audacity — The process of importing video files to extract and edit their audio tracks.
- Microsoft Docs — Technical specifications and structure of the AVI (Audio Video Interleave) container format.
- ISO - International Organization for Standardization — The official standard for MPEG-1 Audio Layer III (MP3), backing claims about its lossy nature and technical properties.